Geyser Servicing: (How & Why)
PS: This article is not relevant to geyser made of Copper or resin inner lining:
How and why, you should service your geyser.
Not recommended for geysers older than 5 years that have not been services before. This is due to geyser being out of guarantee and the anode could be seized in the geyser. Loosening the anode could cause a tear in the geyser welding and result in the geyser leaking. Most geysers carry a 5-year guarantee against leaking conditions
What is an anode?
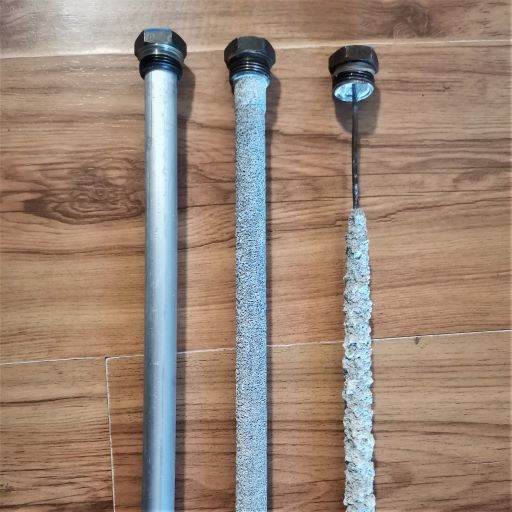
An anode in a geyser is a metal rod, normally made of magnesium or Aluminum.
What is the purpose of an anode?
An anode is designed to break down slowly during the heating process. This is done to protect the integrity of the inner glass lining of the geyser. This process protects the geyser from rusting and eventually leaking.
How often should I replace the anode?
This factor depends on the mineral content of your supply water to the geyser. Cape Town water supply is soft and the total dissolved solids(TDS) in the water is normally below 100ppm. Should the water be supplied by means of a borehole the TDS will be higher. On average, the geyser anode should be replaced every one to two years.
Minerals in you water: Calcium, Zinc, Iron, Potassium, Sodium, Fluoride, and that is just to name a few.
If your geyser is fed from an alternative water supply, test the water using a TDS meter. Refer to your geyser warranty manual for water specifications and servicing requirements.
It is recommended to still service the geyser annually.
What does servicing a geyser mean?
Servicing a geyser means draining the water out of the geyser.
Flushing the tank
Checking the condition of the inner tank for rust.
Replacing the anode and any other parts that may need replacing.
How Do I do this?
Firstly, you will need to source an anode for your specific geyser model you have from your local plumbing supplier.
Tools:
Most anode nuts will require a 28mm socket and a power bar or torque wrench to loosen.
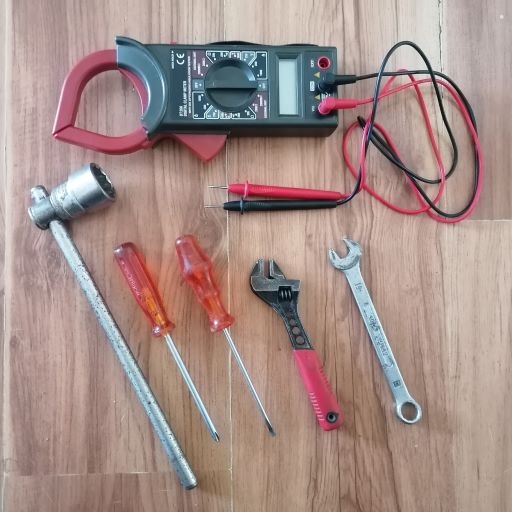
28mm socket
Power bar or Torque Wrench (Required for leverage)
Small Shifting spanner
Star/Flat Screwdriver
13mm Spanner or Element Spanner (Geyser Dependent)
Voltage Meter/clamp meter
Switch off the geyser’s electricity on your electricity board. Verify that you have 0 Volts reading using your voltage meter.
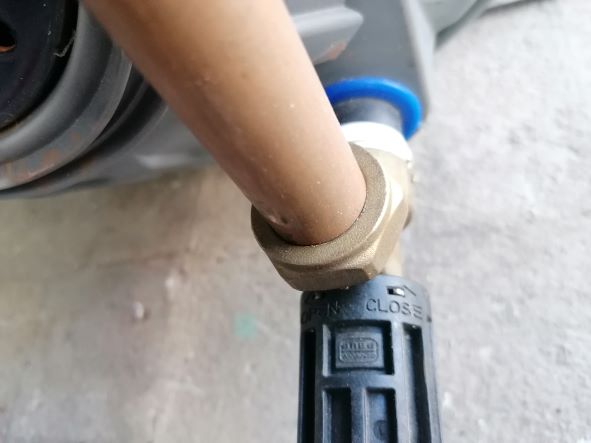
Close the inlet water by closing the shut off device on or before the pressure control valve to the geyser. Normally located in the roof just in front of the geyser.
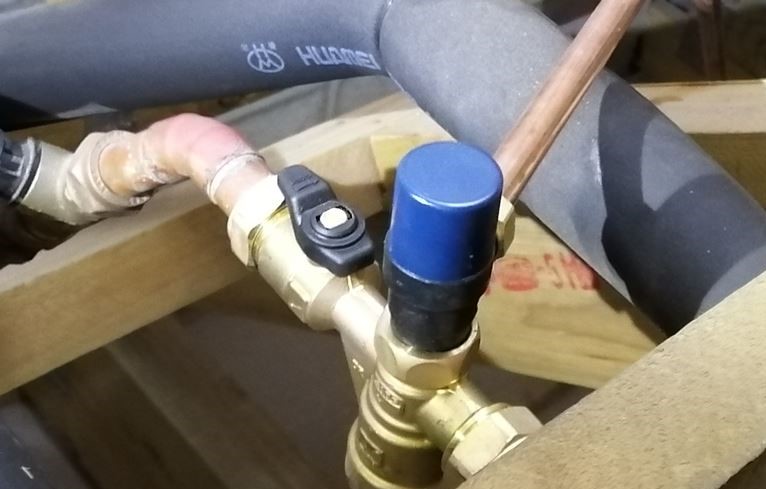
Open a hot water tap and release the pressure off the geyser, until there is no more water coming out of the tap, leave the tap open. After this there will still be water in the geyser but the pressure in the geyser is be released.
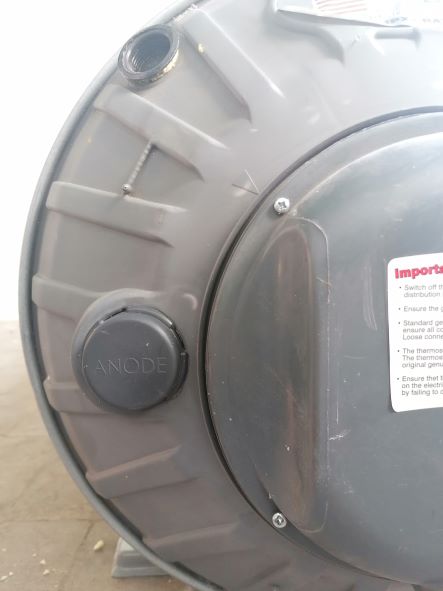
Locate the anode, normally a round cover marked saying ANODE.
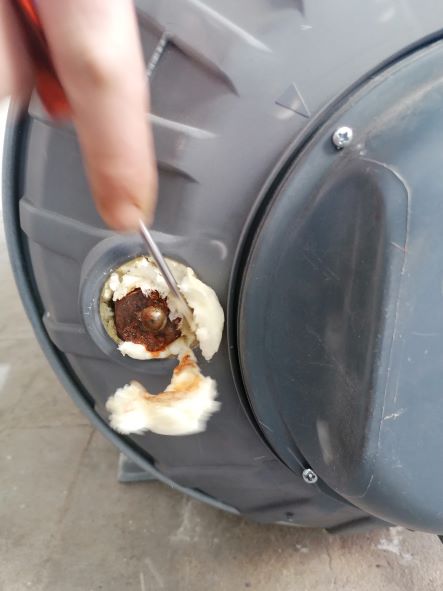 Remove the anode cover and scrape the excess polystyrene around the anode nut to expose the nut to allow for the fitment of the 28mm socket.
Loosen the anode nut slightly in an anti-clockwise direction. (This is done with the tank full of water, but pressure released as this nut is normally very tight). Loosen it with force, but do not shock the nut as this could damage the welding of the tank and cause the geyser to start leaking.
Drain the geyser by means of opening the draincock and allowing the water to run into the driptray. (If safe to do so)
Or attaching a hosepipe to the draincock and lead the hose to a safe location to release the water.
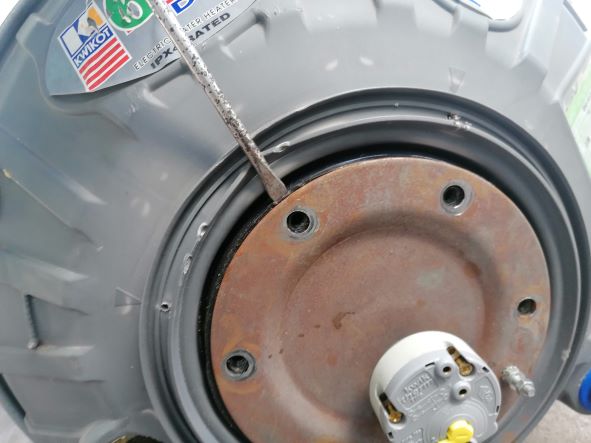
Once the geyser is drained, remove the old anode, and install the new anode. (Don’t overtighten the anode nut) Flush the tank by means of opening the flange area (normally located in the front of the geyser, by the water inlet point), if possible and syphoning out the sentiment that has been left by the old anode, my means of a garden hose. Once clean, refit the flange assembly and tighten the flange plate. Close the draincock in direction indicated. Open the shut off device, situated on or before the pressure control valve to the geyser. Fill the geyser with water.
Once filled, check the anode nut and flange area are fully tight and leak free. Switch on the electricity and check for Voltage and current.
This is it, now your tank should be good to last you a few more years.
This example is assuming the geyser is installed in a horizontal position and the geyser is accessible.
All blogs posted by Smooth Systems (Pty) Ltd are informational pieces only. It is always advisable to consult a licensed plumber before working on your own plumbing. The author of this article and/or Smooth Systems (Pty) Ltd cannot be held liable for any injuries and/or damages caused to self and/or property from attempting to do your own plumbing.